Home inspections are notorious for their ability to turn a seller’s expectations into frustration. When trying to sell your home, nothing is truly certain until the home has gone past the inspection phase. This is true even when you have a buyer with whom you have agreed on the price.
Until the point of the home inspection, owners retain a measure of control over the sales process. They can determine how much they want to sell their property. But as Avalon Management explains, the home inspection takes this control away and puts the advantage in the hands of the buyer.
Instead of being in the driving seat, the property owner is relegated to an observer. He or she must wait on the inspection report and the response from the buyer. If the inspection report does not terminate the deal altogether, there is no assurance it won’t affect the sales price.
This is not a position any seller likes. Unless a buyer waives their right to inspect the home, the owner cannot consider their home sold before the inspection. But buyers rarely do this due to the risks involved in buying a home.
What can homeowners do to reduce the stress they feel during a home inspection? Is there any way they can influence the results to be more in their favor? What can homeowners do to assume a more proactive rather than passive role during an inspection of their home?
Tips to prepare for the home inspection
The steps below offer a systematic way to deal with repair issues that may exist in your home. They also show you the things you can do to make the home inspector’s job easier. By adopting these approaches, you improve the chances that your home will get a favorable report.
1. Clean, de-clutter, and clear access points
~ Clean furnace air filters; ensure that the HVAC is functioning optimally.
~ Give the stove and oven a deep clean. Empty dishes from the dishwasher and remove laundry from the washer and dryer.
~ If closets serve as access points to the attic or crawl space, organize or clear them out.
~ Move stored items to create 3 feet of space around attic and basement walls.
~ Clear about one foot of space around the home’s perimeter to give the inspector access to walls, windows, and appliances.
~ Do not neglect to remove clutter from under the sink and the home’s plumbing.
2. Test the function of the home’s systems
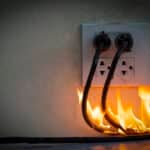
~ Test light switches around the home; replace burnt-out lights.
~ Run all faucets at once to check the water pressure.
~ Check the operation of windows and doors. Inspect locks, seals, and weather stripping.
~ Flush toilets to check for slow flushing. Check all drains for blockages and slow drain.
~ Check operation of garage doors manually and with remote. Test reverse safety mechanism.
~ Inspect heating ducts in the crawl space; ensure they are connected.
~ Also, ensure that the fan ducts are venting out of the attic.
3. Check the home’s safety and security
~ Using the self-test function, test the operation of carbon monoxide and smoke detectors. Also, check expiration dates on monitors and, if necessary, replace batteries.
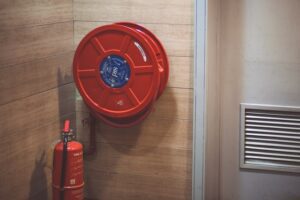
~ Inspect the fire extinguisher, test its function and ensure the gauge is in the right position.
~ Shut off all unused gas lines and cap them off.
~ Cap chimneys and flues to keep debris from falling into them and prevent animals from getting into them.
~ Do thorough bug/rodent extermination. If possible, hire an exterminator and ensure all entry points and food sources are properly dealt with.
4. Do necessary repairs and maintenance
~ Replaced cracked or broken windows and torn screens, including basement windows.
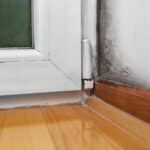
~ Check caulking around bathtubs and sink; re-caulk, if needed.
~ Also check for stained tile grout in the bathroom and kitchen. Clean or apply new grout if necessary.
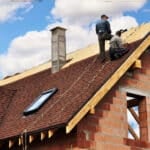
~ Inspect the roof for missing or damaged shingles and repair or replace them.
~ Inspect insulation around the attic and crawl space; replace where necessary.
~ Inspect home’s plumbing for leaks, frayed pipes, or worn components; replace or repair, as needed.
~ Check the home’s foundation for minor cracks and holes.
5. Take care of the home’s exterior
~ Remove all debris, moss, and lichen from the roof.
~ Remove tree branches that are close to the roof. Remove all dead tree branches, even if they are not close to the roof.
~ Clear gutters and ensure downspouts are discharging correctly.
~ Remove debris around external HVAC components.
~ Grade soil around the home to make sure it slopes away from the house.
6. Final preparations
~ Have all paperwork ready, including the home’s maintenance/repair records and insurance claims.
~ Leave pilot lights on gas-fired appliances on.
~ Leave the utilities on.
~ Leave all keys and remotes. Make sure you label the keys for easy identification.
~ Leave a map or sketch to any hard-to-find areas of the property.
Finally, be ready before the inspector arrives and plan to be away from home for three hours, along with your pets.
The best way to find out what any issues are with your home is to have it inspection. Contact us to schedule an inspection today!


